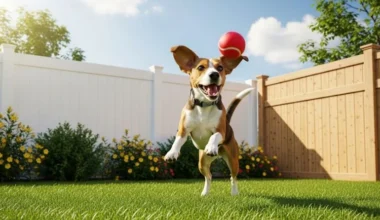
You love your lush, green lawn. You also love your dog. Right now, it probably feels like you can’t have both. Those tell-tale yellow and brown spots from dog urine are a constant, frustrating reminder that your dog’s potty habits are at war with your landscaping dreams. It can feel like an endless cycle of damage and repair.
But what if you could solve this problem permanently, without resorting to expensive chemical treatments or constant lawn repair? The solution is to create a dedicated ‘potty zone’. This is a specific, designated bathroom spot in your yard that protects your lawn and makes cleanup an absolute breeze. This guide will show you exactly how to create a designated dog potty area. We will cover everything from choosing the perfect location and the best materials, all the way through to training your dog to use it consistently. Get ready to reclaim your beautiful lawn for good!
Why a Designated Potty Area is a Game-Changer

Before you grab a shovel, let’s look at why this simple weekend project is one of the best investments you can make for your yard and your sanity. A dog potty area is more than just a convenience; it’s a cornerstone of a truly harmonious, dog-friendly yard.
- It Solves Lawn Burn for Good: The primary cause of those dead, yellow patches on your grass is the high concentration of nitrogen in your dog’s urine. While a little nitrogen is a fertilizer, a concentrated dose acts like a chemical spill, killing the grass from the roots up. Therefore, by containing all of that nitrogen in one specific, durable spot, you completely protect the rest of your lawn from this constant damage.
- It Makes Cleanup Fast and Easy: A potty zone concentrates all the mess in one predictable place. As a result, daily scooping becomes a quick, simple chore instead of a scavenger hunt across the entire yard. Furthermore, the materials used in a potty area are designed to be easily rinsed and sanitized, which is much more effective than trying to clean a traditional lawn.
- It Protects Your Garden and Plants: A designated bathroom keeps acidic urine away from the delicate root systems of your flowers, shrubs, and vegetables. Many plants are sensitive to the chemical makeup of dog urine. Consequently, a potty zone can prevent mysterious wilting or damage to your prized ornamental plants and edible crops. This is especially important for protecting them from accidentally chewing on common but toxic plants for dogs
- It Creates Clear Boundaries for Your Dog: This project is your dog’s first and most important lesson in “Dogscaping.” It clearly teaches them that different parts of the yard have different purposes. The lawn is for playing, the garden bed is for observing, and the potty zone is for business. This fundamental understanding makes it easier to manage all other aspects of a dog-friendly yard.
Step 1: Planning Your Perfect Potty Zone
A little bit of thoughtful planning goes a long way. Answering these three questions before you start will ensure your project is a success from day one and that you create a space your dog will actually want to use.
Choosing the Perfect Location
The location of your potty area is the single most important factor in whether your dog will use it consistently.
- Convenience is Key: The spot should be easily and quickly accessible from the door you use most often for potty breaks, like your back door or patio door. If it’s a long, inconvenient trek to a far corner of the yard, you and your dog will be less likely to use it, especially in bad weather.
- Discretion Matters: While it should be convenient, you probably don’t want the potty area to be the main feature of your backyard. Choose a spot that is slightly off to the side, away from high-traffic social areas like your main patio, deck, or your children’s play area.
- Consider Drainage: Look for a spot in your yard that is relatively level and does not naturally collect water after a heavy rain. Good drainage is essential for keeping the area clean and odor-free. Avoid low-lying areas.
- Proximity to a Hose: For easy cleaning, it’s a huge bonus if your chosen location is within reach of your garden hose. This will make rinsing down the area a simple, weekly task.
Deciding on the Right Size
The size of the potty area should be appropriate for the size of your dog. They need enough room to walk around, sniff, and find the perfect spot.
- For small dogs (like Chihuahuas or Yorkshire Terriers, under 30 lbs), a 4×4 ft or 5×5 ft square is often sufficient.
- For medium to large dogs (like Beagles, Labradors, or German Shepherds), you should aim for a larger, rectangular area. A space around 5×10 ft or 6×12 ft gives them plenty of room to move around comfortably. A rectangle is often better than a square for larger dogs, as it allows them to walk a few steps.
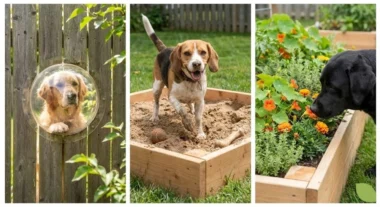
Selecting the Best Surface Material (A Comparison)

The surface you choose is critical for drainage, ease of cleaning, and your dog’s comfort. Here are the three most popular and effective options, along with their pros and cons.
- Pea Gravel: This is a very popular and effective choice. It consists of small, smooth, rounded stones.
- Pros: It offers excellent drainage, allowing urine to pass through quickly. Solid waste is very easy to spot and scoop. Additionally, it’s simple to clean by rinsing with a hose. Many dogs also naturally like the texture.
- Cons: Some dogs with sensitive paws may dislike the texture. Also, the small stones can get hot in direct, intense sunlight, so a shady spot is preferred.
- Artificial Turf: Modern, pet-friendly artificial grass is an increasingly popular and fantastic option.
- Pros: It has the look and feel of real grass, which most dogs instinctively love. It’s incredibly durable and designed with a permeable backing for immediate drainage. Best of all, it’s very easy to sanitize with specialized, non-toxic cleaners.
- Cons: The initial cost of materials and installation is significantly higher than other options. Furthermore, like pea gravel, it can get hot in direct sun without a proper infill.
- Wood Mulch (Cedar is best): A natural and budget-friendly choice.
- Pros: It’s soft on paws, inexpensive, and provides a natural look. Cedar mulch specifically has natural odor-control and insect-repellent properties.
- Cons: It absorbs and holds moisture more than other options. Therefore, it breaks down over time and will need to be topped up or completely replaced annually. It can also be kicked or tracked out of the designated area more easily.
Step 2: Building Your Dog Potty Area (A DIY Guide)
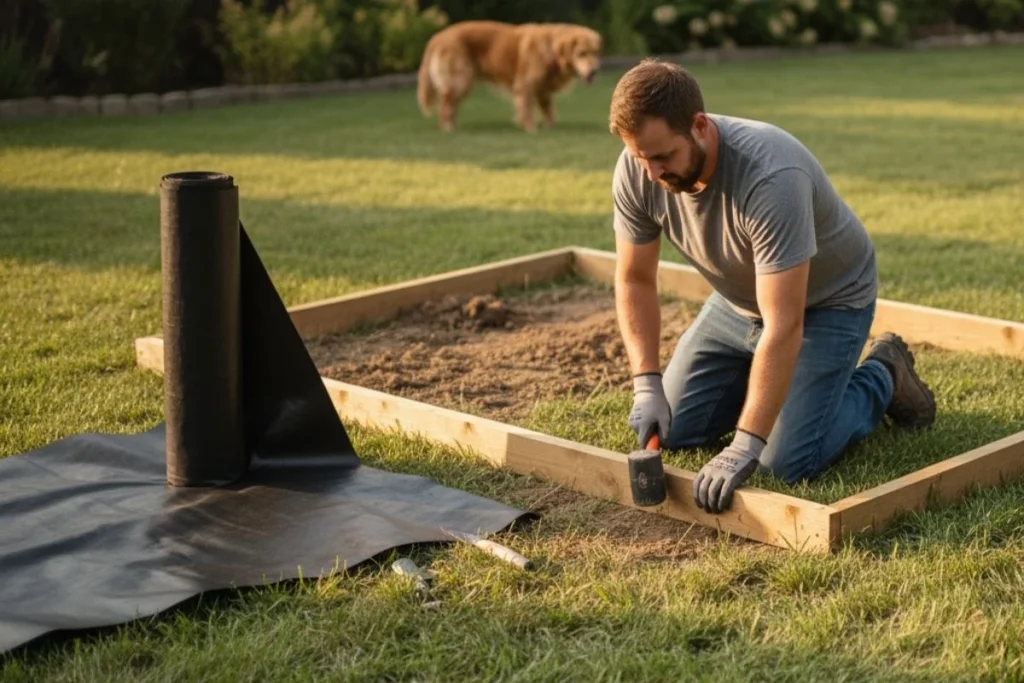
With your plan in place, it’s time to build. This project can easily be completed in a single afternoon with some basic garden tools and a little bit of effort.
1. Gather Your Tools and Materials
First, make sure you have everything you need before you begin. This will make the process much smoother.
- Tools: Shovel, garden rake, wheelbarrow, tape measure, utility knife.
- Materials: Your chosen border material (e.g., landscape timbers, plastic edging), landscape fabric, and your chosen surface material (pea gravel, turf, or mulch).
2. Mark and Prepare the Area
Next, use your tape measure to mark out the dimensions of your potty area. You can use stakes and string or a line of spray paint to create a clear outline. Then, use your shovel to remove the existing grass and sod from within this area. You should dig down about 3 to 4 inches to create a shallow recess for your new materials.
3. Install the Border
After that, install your border material around the perimeter of the excavated area. This is a crucial step that will contain your new surface material and keep your yard looking neat and tidy. Ensure the border is level and secure.
4. Lay Down Landscape Fabric
This is a critical step that you should not skip. Roll out a high-quality landscape fabric to completely cover the bare earth inside your bordered area. This fabric is permeable, allowing water to drain through, but it will block weeds from growing up through your new potty area, making maintenance much easier. Use your utility knife to trim it to fit perfectly.
5. Fill with Your Chosen Surface Material
Finally, it’s time to fill the area. Use your wheelbarrow to transport your pea gravel, mulch, or turf base into the bordered space. Spread it evenly with your rake until it is level with the top of your border.
Optional) 6. Add a “Target Post”
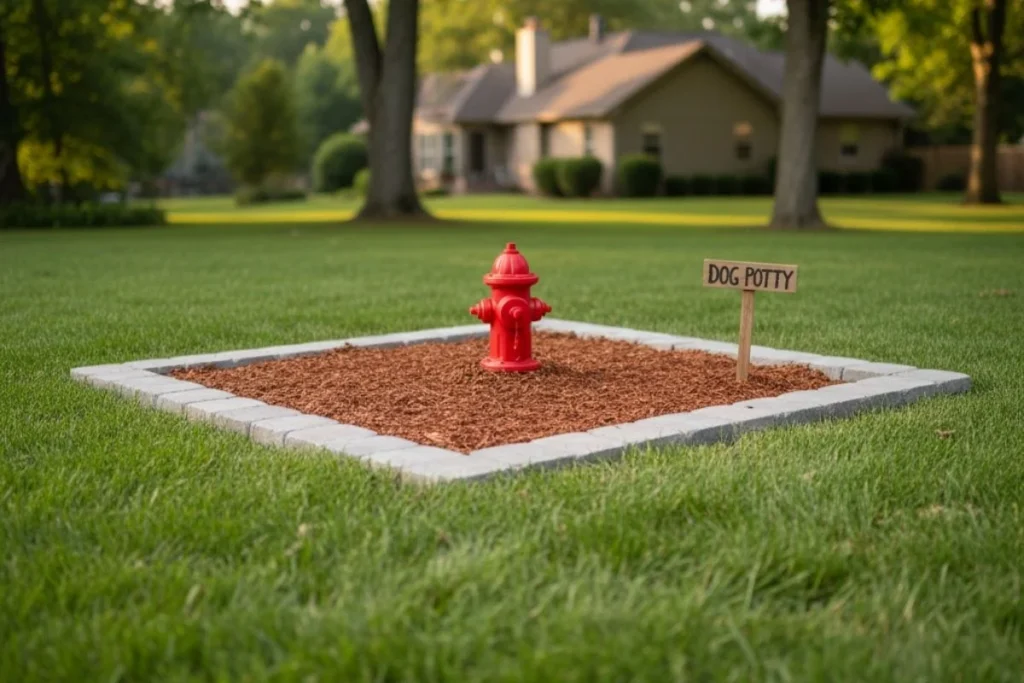
For male dogs who prefer to lift their leg, adding a vertical target can greatly encourage them to use the new spot. You can use a decorative wooden post, an interesting-looking large rock, or even a whimsical, fake fire hydrant. Place it in the center or back of the potty area.
Step 3: Training Your Dog to Use the New Potty Zone
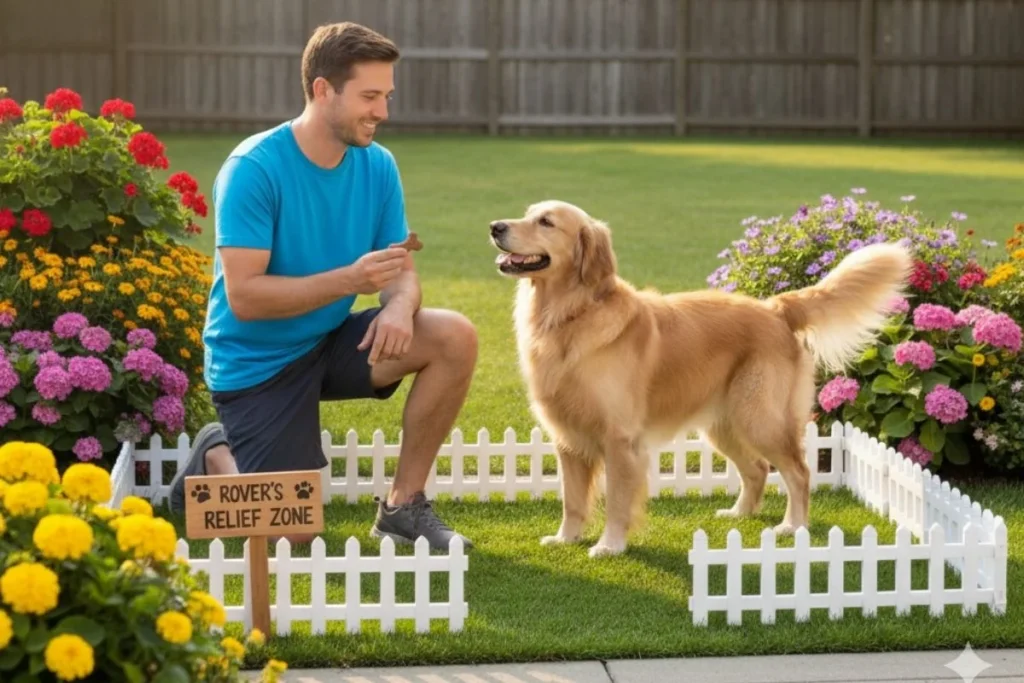
- Lead with the Leash: For the first week or two, you must always take your dog to the new spot on a leash for every single potty break. Do not let them run free in the yard and hope they find it. You need to guide them directly to the new location every time.
- Use a Consistent Command: As you enter the spot, use a clear and happy verbal cue like “Go potty!” or “Do your business.” Use the same phrase every time so your dog learns to associate it with the action and the location.
- Reward Success Lavishly: This is the most important part of the training. The instant your dog finishes urinating or defecating in the correct spot, reward them with a very high-value treat—something special they don’t get all the time, like a small piece of chicken, cheese, or their absolute favorite treat. Combine this with lots of enthusiastic praise like “Yes! Good potty!”
- Use Scent Encouragement: To help your dog get the idea initially, you can take a piece of their poop from the lawn and place it in the new spot. This powerful scent cue clearly tells them, “This is an appropriate bathroom.” You only need to do this for the first day or two.
- Be Patient and Consistent: Stick to the plan religiously. Take them out frequently, always on a leash, always to the same spot, and always with a big reward for success. Some dogs will understand the concept on the very first day. Others may take a week or two of consistent repetition. Consistency from every member of the family is everything.
- Managing Accidents: If they have an accident on the lawn, do not scold or punish them. They will not understand, and it will only create anxiety. Instead, view the accident as a gap in your training. Simply clean the spot on the lawn thoroughly with an enzymatic cleaner (which eliminates the odor so they aren’t attracted back to that spot) and be more diligent with the on-leash training schedule. Remember, positive reinforcement is key to solving all kinds of unwanted behaviors, not just potty training, but also issues like how to stop a dog from digging.
Big Picture: How Your Potty Zone Fits In
Creating a designated potty area is a fantastic and effective project that solves a major landscaping headache. This simple ‘zoning’ concept is actually a core principle of creating a larger, harmonious yard where all of your dog’s needs are met. When you design your yard with your dog in mind, you prevent destructive behaviors like digging and chewing before they even start.
INTERNAL LINK: To see how this potty zone fits into a complete, beautiful, and resilient backyard plan—complete with durable paths, protected flower beds, and dedicated play areas—be sure to read our ultimate pillar post on how to design a garden layout that your dog won’t destroy.
Conclusion
The path to a pristine, spot-free lawn is a simple three-step process: Plan your spot, build it with the right materials, and patiently train your dog with positive reinforcement. It’s a small investment of time for a huge payoff in the beauty of your yard and your peace of mind.
With a bit of weekend work and some consistent training, you can solve the problem of lawn burn for good. You now have a complete blueprint that shows you how to create a designated dog potty area and reclaim the lush, green, and beautiful lawn that you, your family, and your dog deserve to enjoy together.